Search
Handprints of Your Family
Activity Description
Handprints or hand tracings of both adults and children are one type of art made by prehistoric artists that is found in caves all over the world. We also learned from "The Croods" movie series that family and community have always been important for survival. For this activity, you will create your own handprints or hand tracings of yourself and of members in your family.
One technique that was used by prehistoric artists to create art that was found in caves was to put pigment into their mouths and then spit or blow it out of their mouths. For your family art creation, we have a different technique to try.
What You Need
- Paper bag or dark colored paper
- Scissors
- White paper (or lighter colored paper to trace on)
- Pencil
- Tape
- Paint, oil pastels, chalk, or crayons
- Optional: Small piece of sponge (can be used if painting)
Directions
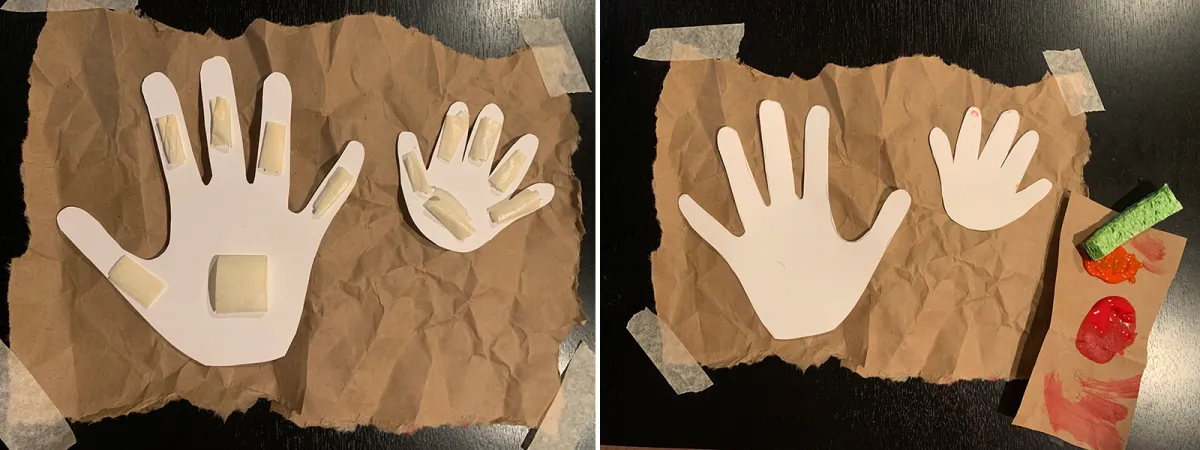
1. Gather your supplies. For this activity, you will need a paper bag (ie. from the grocery store) or dark colored paper, lighter colored paper, a pencil, scissors, tape, and then one art medium: paint, oil pastels, chalk, or crayons. If you are using paint, you have the option of also using a small piece of a sponge or other textured material if you would like. For the example here, paint and a sponge are both used.
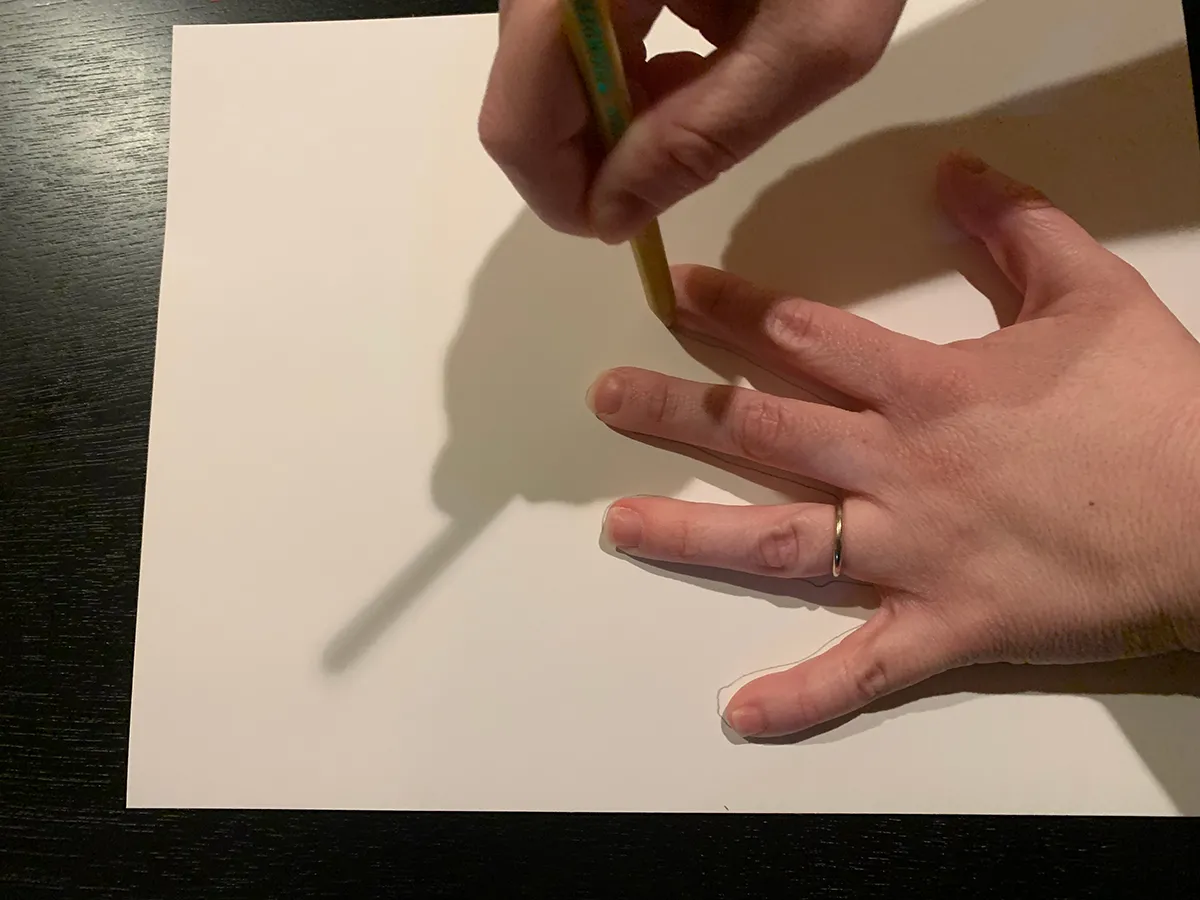
2. Trace your family’s hands. Using your pencil, trace around your hand. Ask other family members if you can trace their hands, too! How many hands can you use in your family handprint artwork?
3. Cut out the hand tracings. After you have collected your hand tracings from your family members, carefully cut out each hand. Once your hand tracings have been cut out, set them aside while you prepare your “rock” paper.

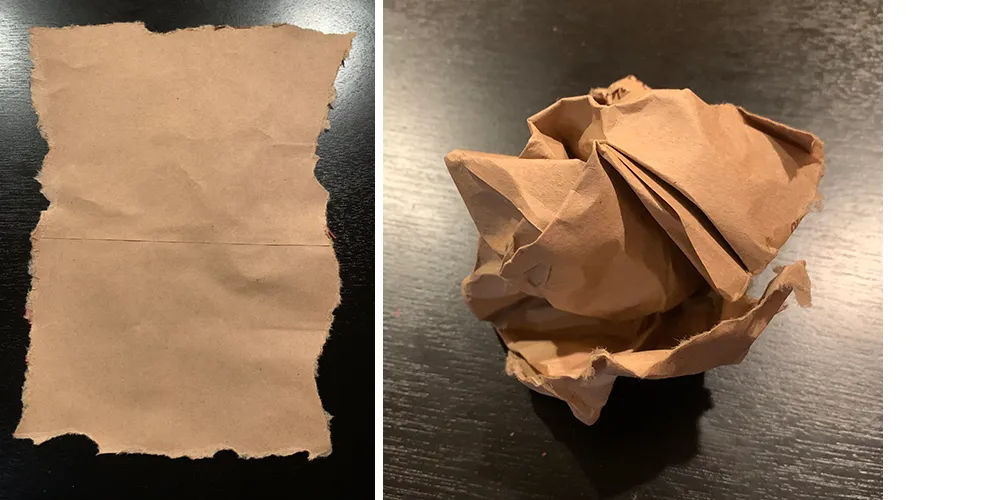
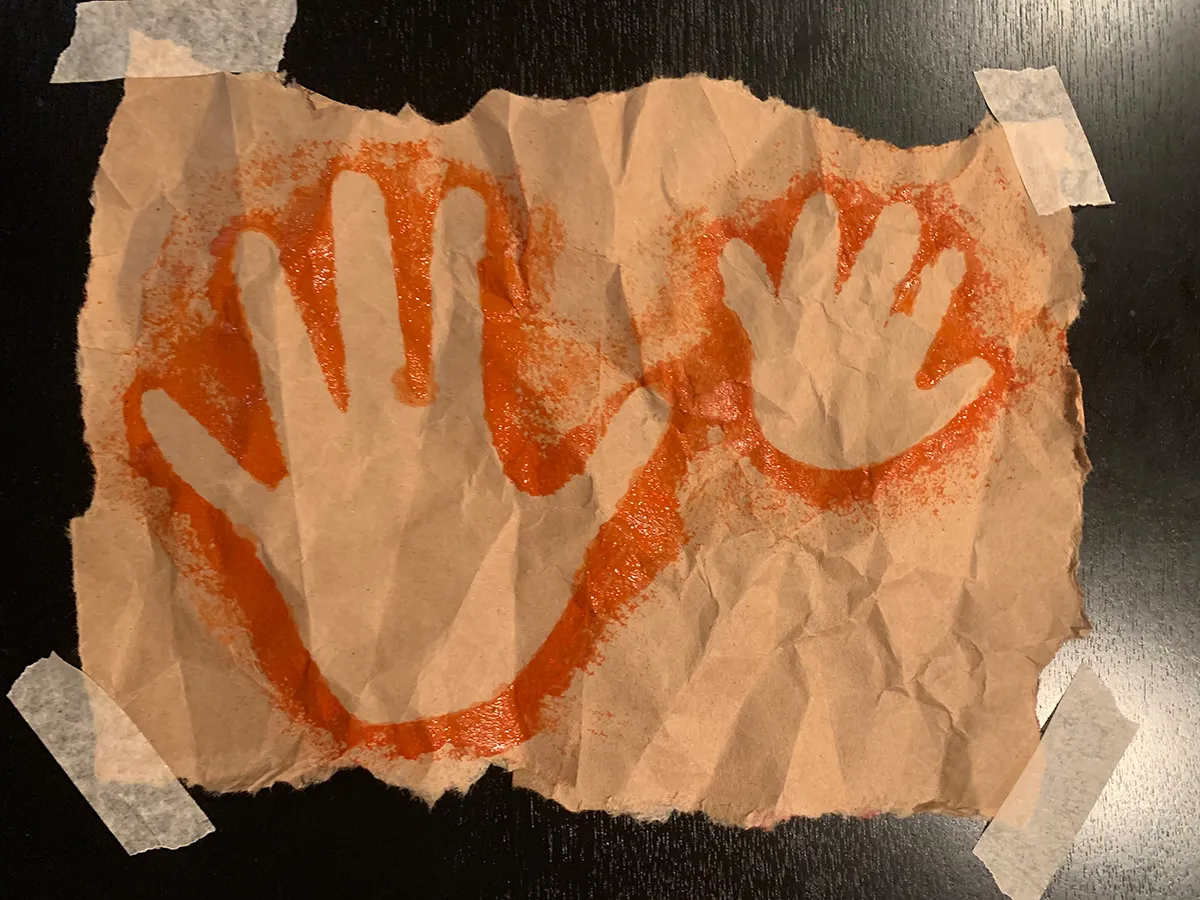
4. Prepare your “rock” paper. Start by tearing all of the edges of your paper bag or dark colored paper. This will help to roughen the edges of your artwork and will help to make your piece look aged. To add even more of an effect, crumple your rock paper up into a ball. Flatten out your paper and secure it to your surface by taping down the corners. Maybe your surface is a table, on the floor, or on the wall or ceiling of your own cave fort you built!
5. Tape your cut out hand tracings to the rock paper. Arrange your hand cutouts how you would like them to be on your rock paper. Flip them over to apply tape. Be sure that each finger gets its own piece of tape. That will help keep the fingers down on the paper when you are adding color later. Once you have added tape, flip the hands back over. Make sure they are secure by giving each hand on the paper a high-five!
6. Transfer your hand outlines onto the paper. Using your chosen art medium, apply color to the outer edge of the hands and onto the rock paper. In the example, paint was used with a sponge. If doing this technique, use a little paint each time to pat the paint onto the hand and paper. For other mediums, like crayons, oil pastels, or chalk, turn your coloring tool sideways and roll it along the hand. Be careful to not get it under the hand. You can try other techniques, too! Maybe you want to color all over the rock paper except for the parts covered by the hands. Maybe you want to finger paint around your handprint! No matter what technique you use, be sure to get ALL the way around the hand and that color gets onto the rock paper.
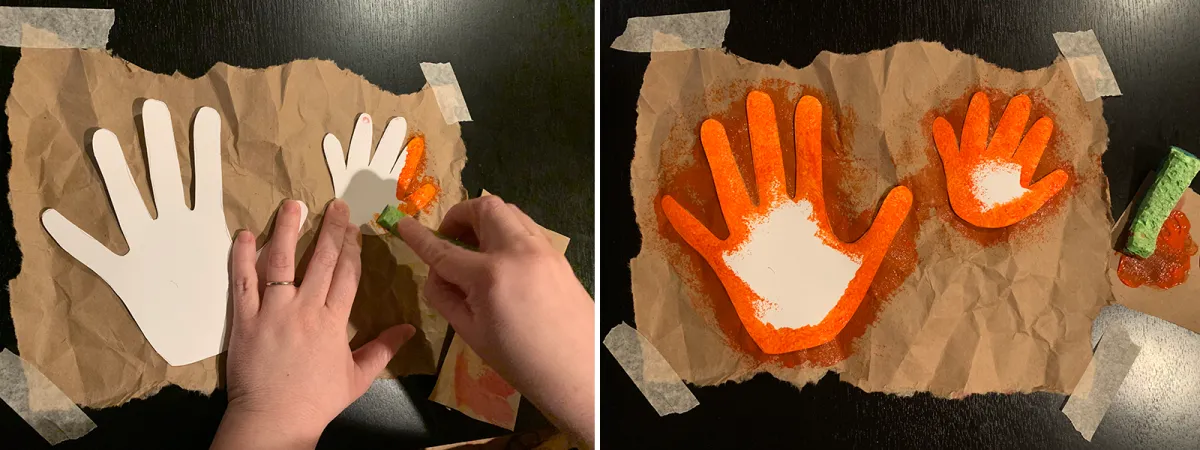
7. Unveil your handprints! When you are finished adding color, carefully lift up your hand tracings to reveal your cave art inspired family handprint artwork! If you would like, you can even add the name of each person and the date this family handprint work was created.
Take It a Step Further
- Make a cave and take your handprints into your new cave.
- Make one left and one right hand for your entire family.
- Practice counting using your hand artwork. How many hands are in your family? How many fingers are in your family?
Explore More
- Look up close at another example of rock art! Explore a 3D model of the 40,000 - 60,000 year old Apollo 11 plaque found in a rock shelter in Namibia.
3D Apollo 11 Rock Shelter Plaque - Learn more about rock art and other forms of art and expression from ancient humans.
- Join Dr. Briana Pobiner for a recorded virtual tour of the Hall of Human Origins! Use the link provided and scroll down to view 3 videos for the virtual tour of this hall.
- Want to explore the Hall of Human Origins on your own? Click the Time Portal to enter the exhibit and continue your exploration by dragging your cursor around and clicking on the arrows. Zoom in to make even closer observations.
- To learn more about ancient humans, the science behind how we learn about the lives of ancient humans, and about the Hall of Human Origins, you can visit this website: Human Origins: What Does It Mean to Be Human?
K-2,
3-5
Anthropology and Social Studies